

The Kitchener Stitch, although a fabulous and beautiful skill that all knitters should possess, is polarizing, and very difficult for some folks, so I’ve made a tutorial that will hopefully help some folks.
I’ll admit, I was one of those people who had a severe mental block regarding the Kitchener Stitch for a long, long time. It takes concentration, and the instructions can be fairly easy to misinterpret, which I used to do. But, now that I am a Kitchenerer, I want everyone to know how not-impossible it is. Remember, you’ve got this, knitter!
Kitchener Stitch
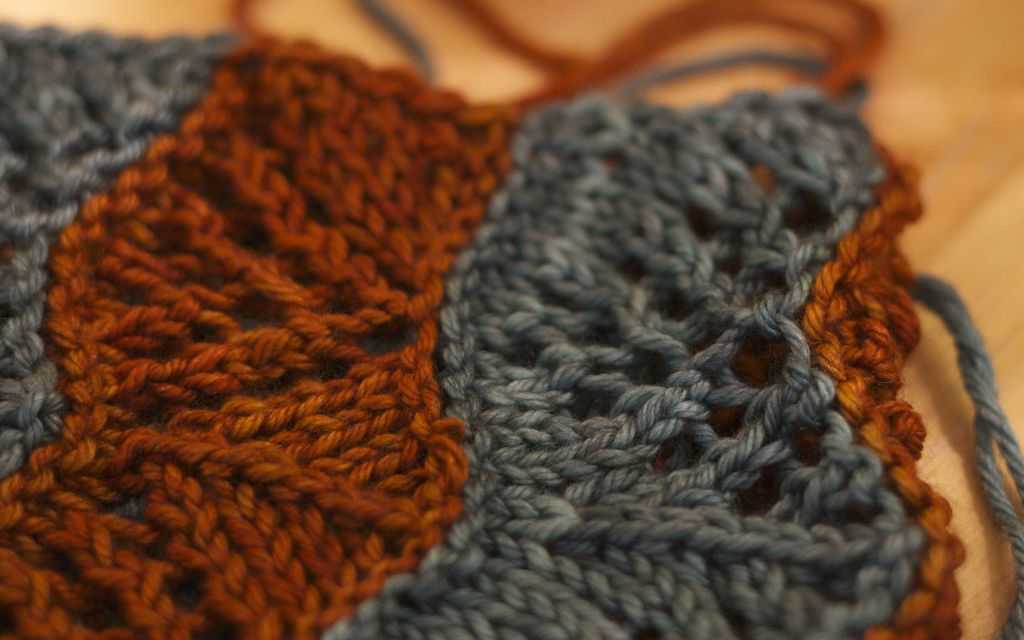
Also called grafting, the Kitchener Stitch is used to join two pieces of knitting in a way that it appears seamless.
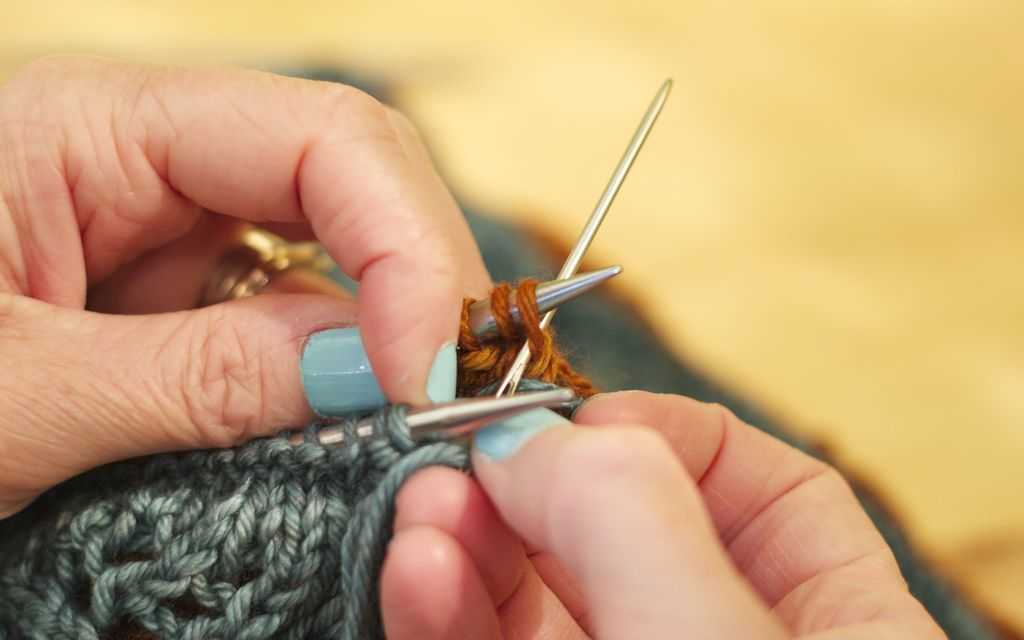
Start with your two pieces, wrong sides facing, on needles of the same size, and a long tail threaded through a tapestry needle.

Set Up
Insert tapestry needle, as if to purl, in the first stitch of the front needle, draw yarn through, but do not pull stitch off of needle. Be sure to keep the yarn under the points of the two needles.
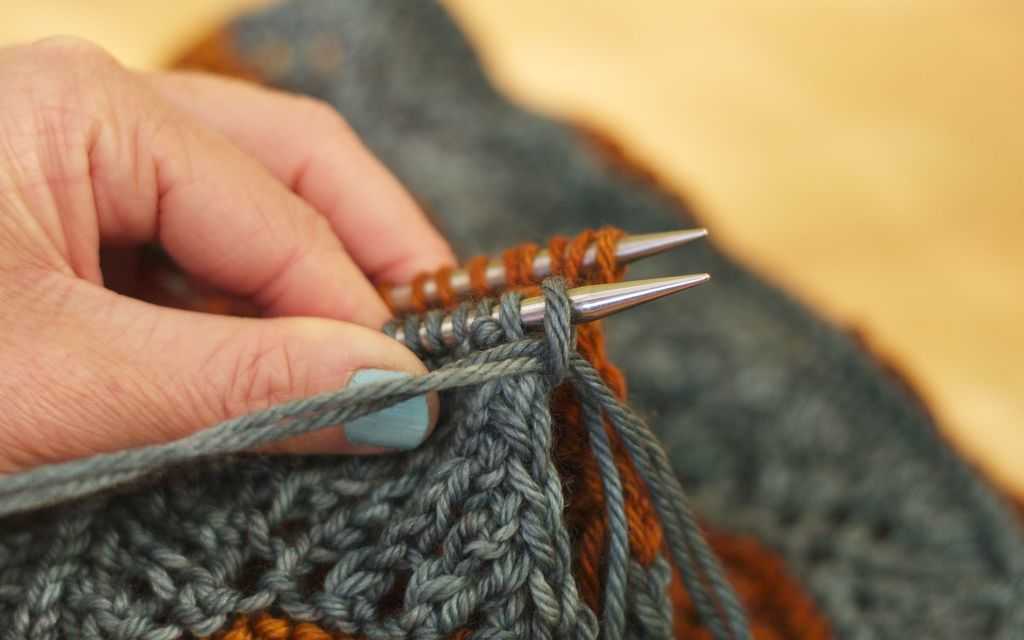
Insert tapestry needle, as if to knit, in the first stitch of the back needle, draw yarn through, but do not pull stitch off of needle. Be sure to keep the yarn under the points of the two needles.
You have not dropped any stitches off of needles, and you are ready to start Kitchenering.
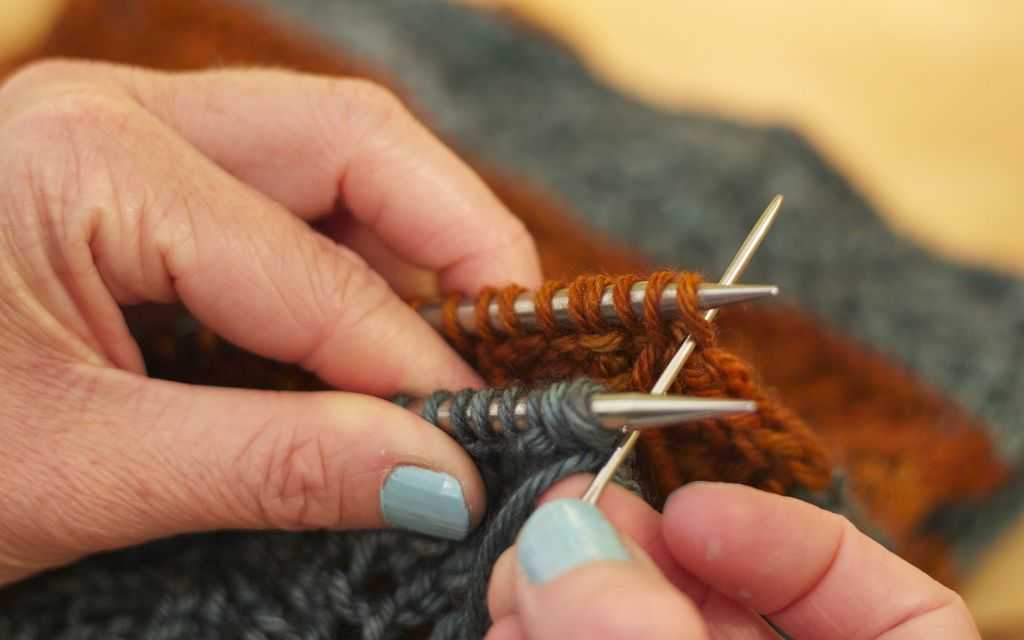
Step 1: Front needle
Insert tapestry needle, as if to knit, in the first stitch of the front needle, and pull that stitch off with the tapestry needle.
Insert tapestry needle, as if to purl, in the second stitch of the front needle, and draw the yarn through that stitch, leaving the stitch on front needle. Again, be sure to keep the yarn under the points of the two needles.

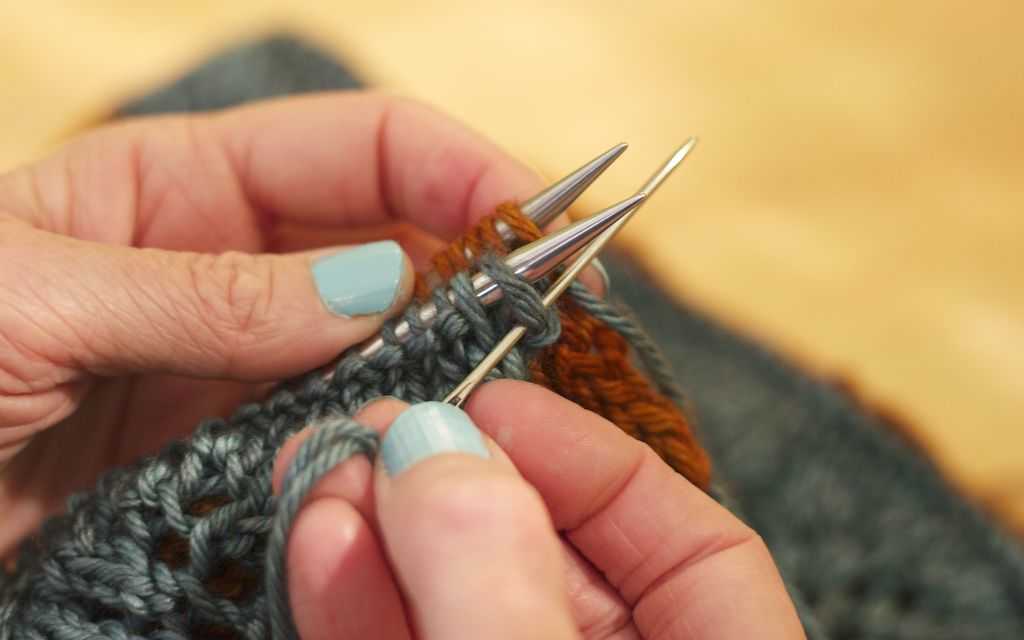
Step 2: Back needle
Insert tapestry needle, as if to purl, in the first stitch of the back needle, and pull that stitch off with the tapestry needle.


Insert tapestry needle, as if to knit, in the second stitch of the back needle, and draw the yarn through that stitch, leaving the stitch on front needle. Again, be sure to keep the yarn under the points of the two needles.
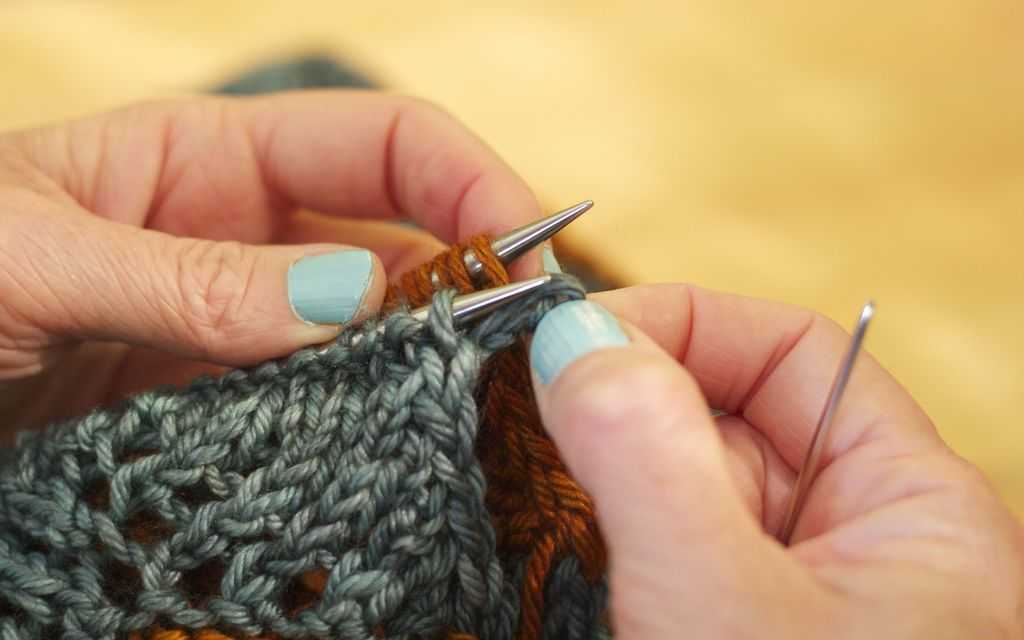
Repeat Steps 1 and 2 to the end.
Kitchener Stitch can be onerous, that’s for sure. BUT. Look at that seam. So lovely. So worth it.
Something to keep in mind when Kitchener-ing – there’s definitely a rhythm, once you get going – you can chant to yourself “Knit, purl, purl, knit.”
Unrelated: I just LOVE the nail polish color I’ve been using lately. I have this one and one the same basic tone and idea, but more seafoam-y green. It’s the little things, isn’t it?
Comments
Brilliant! I love the photos of each step!
Thanks, very helpful and easy to follow.